Trail Foodies
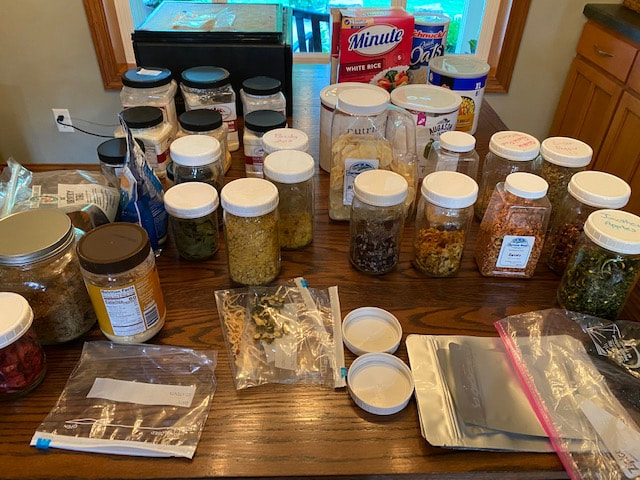
The kitchen is flooded with ingredients for making our own backpacking meals.
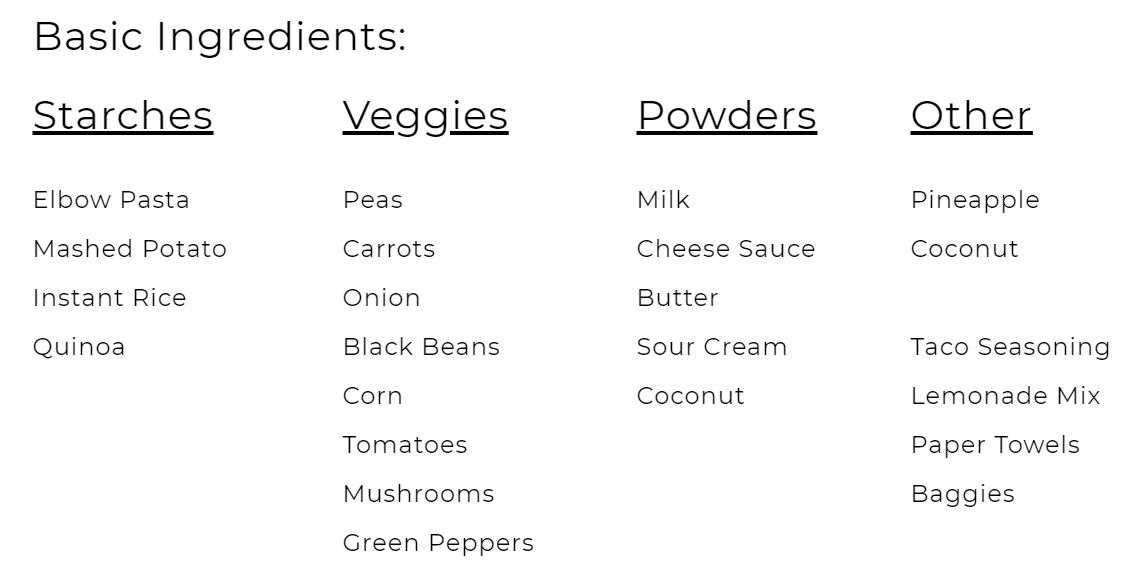
Love Mountain House meals and ready to try preparing similar meals that are tasty on your own? Below are some resources and ideas to dehydrate your own meals for backpacking and hiking with basic steps; some of our favorite trail recipes; ideas for how to plan the meals for your trip for breakfast, lunch, and dinner; and delicious campfire meals when you can take the extra weight. This is a quickly evolving page and we continue to add new things we are making and find delicious, or new ways of organizing and planning the process of packing meals for the trail.
Dehydrating Meals for Adventuring
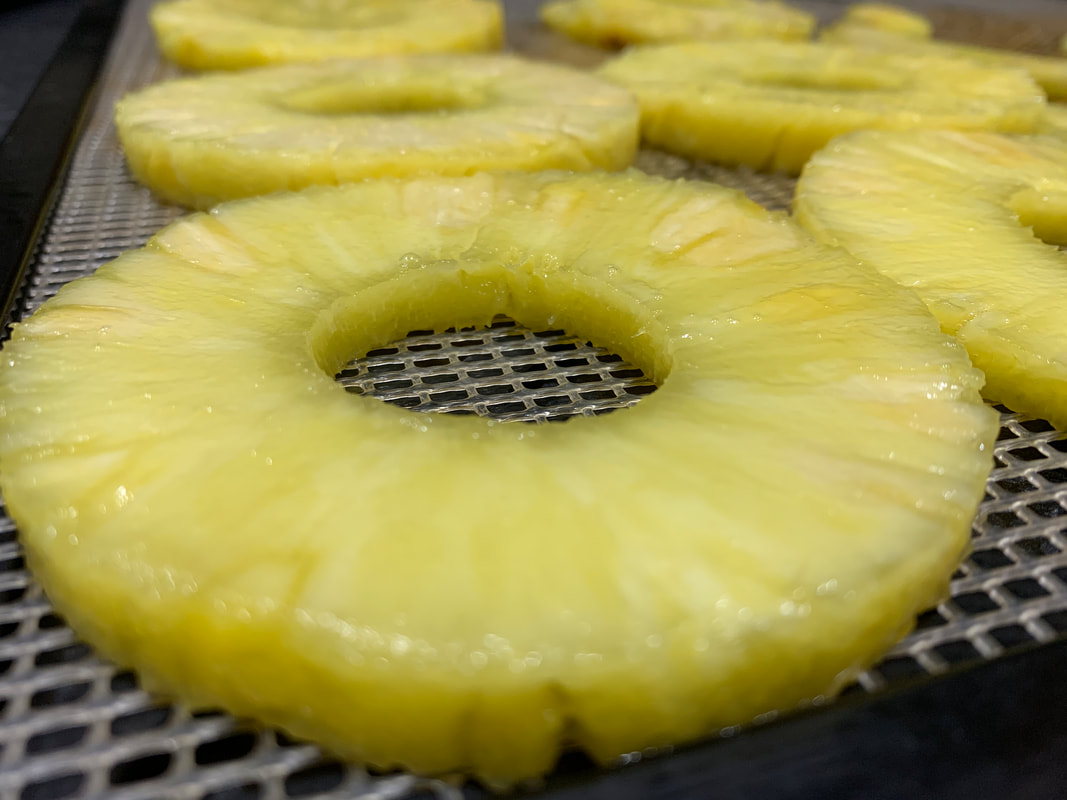
Pineapple is a real treat on the trail and packs a sweet punch in a meal.
Key Features:
-Reduce sodium & control your ingredients
-Reduce package waste and volume
-Can extend shelf-life days to years
-Fatty foods don't dehydrate well
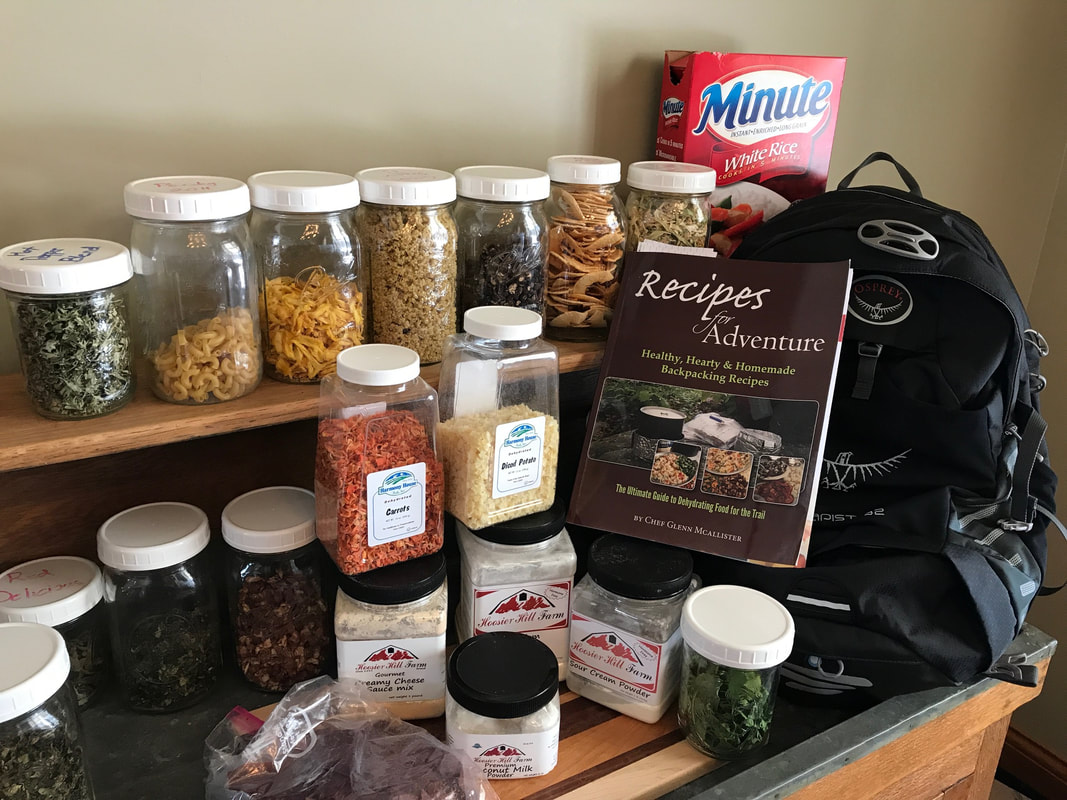
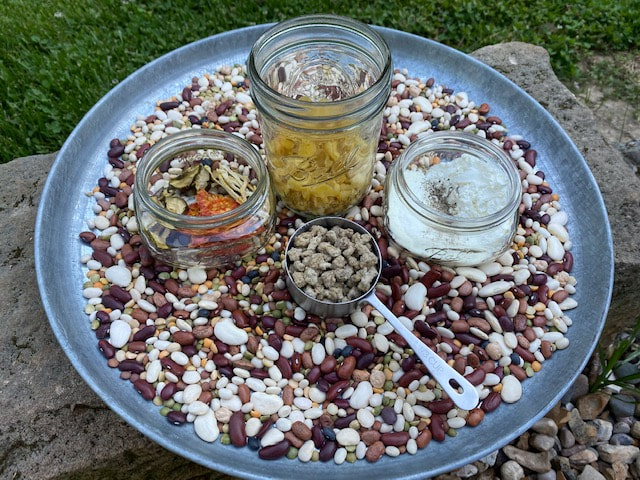
Dehydrating Supplies
|

Dehydrating backpacking meals assembly line
|

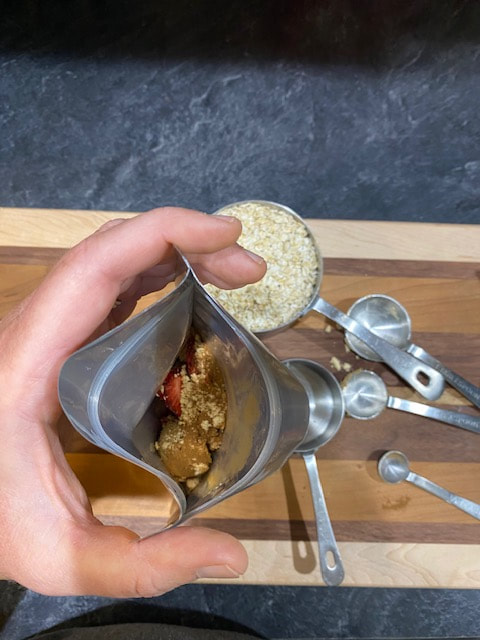
Prepping the dehydrated meal bag
|
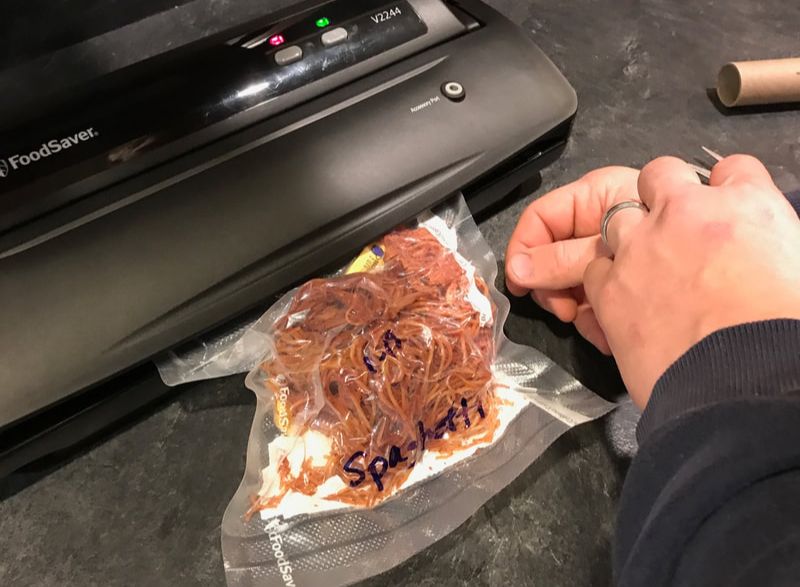
Sealing the dehydrated meal
|
The Basics of Dehydrating Meals
Making your own meals is not as intimidating as you might think.
Our advice is:
1. Purchase a quality, high load volume dehydrator; purchase a food saver and bags and oxygen absorbers if you want to vacuum seal leftover components for extra long storage; purchase Mylar heat-sealing bags if you want to make a disposable package instead of using your cup to reheat meals; purchase small Ziploc bags to store powders separate of foods for better results.
2. Set up a spot near in the kitchen where you can keep an eye on it, but where the
project ongoing for a few days won't drive you crazy. It is noisy too, so if that disrupts
your TV watching, think ahead. If you use hot peppers, the fumes might be intense.
3. Purchase/grow/cook whatever your heart desires for meals. Too much cabbage in the
garden- throw it in...leftover chili...throw it in... extra spaghetti sauce... you get it, right?
4. Follow the instructions for time and heat on your dehydrator. This process needs to be thought out if you intend to prep all the ingredients yourself. It usually takes us a full week of dehydrating to be ready to go.
5. Store ingredients until you have everything dehydrated that you need. (We use Ball jars.)
6. Make an assembly line of all the ingredients along with measuring cups and spoons. We find that making numerous meals in one session makes the effort and mess balance out. This step usually takes us several hours and makes a big mess of the kitchen.
7. Load your powders in a small baggie. Load into your vacuum sealer bags & seal.
8. Optional add-ins for the trail include: lemonade packs, a paper towel, and/or individually
packed wet-wipes.
9. With a Sharpie, write the name, date, and amount of water needed for re-hydration on the trail.
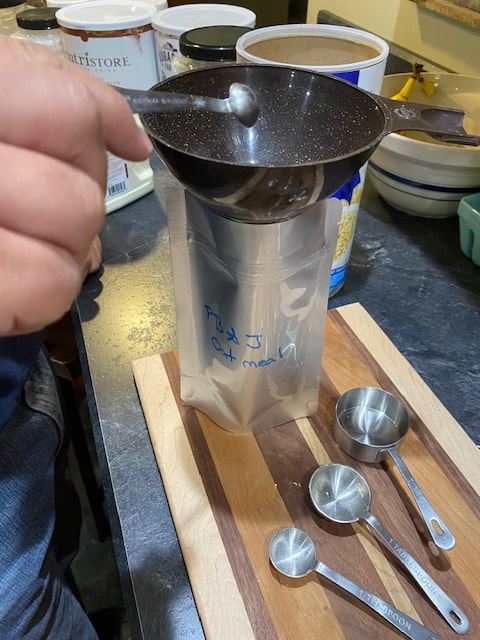
Filling Mylar bags works better with a Ball jar funnel.
|
Pint sized Mylar bags work well for oatmeal breakfasts.
|
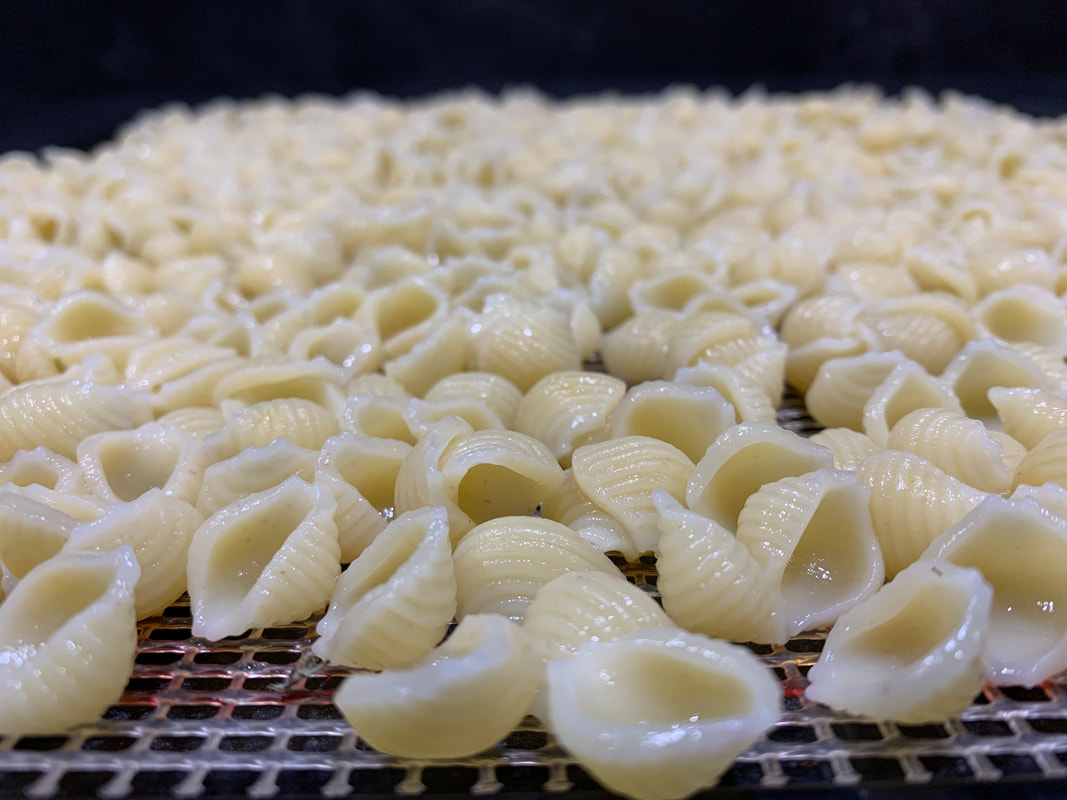
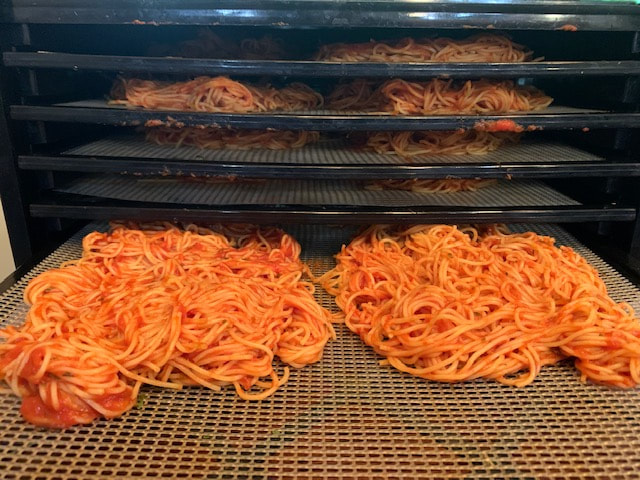
Dehydrated pasta
|
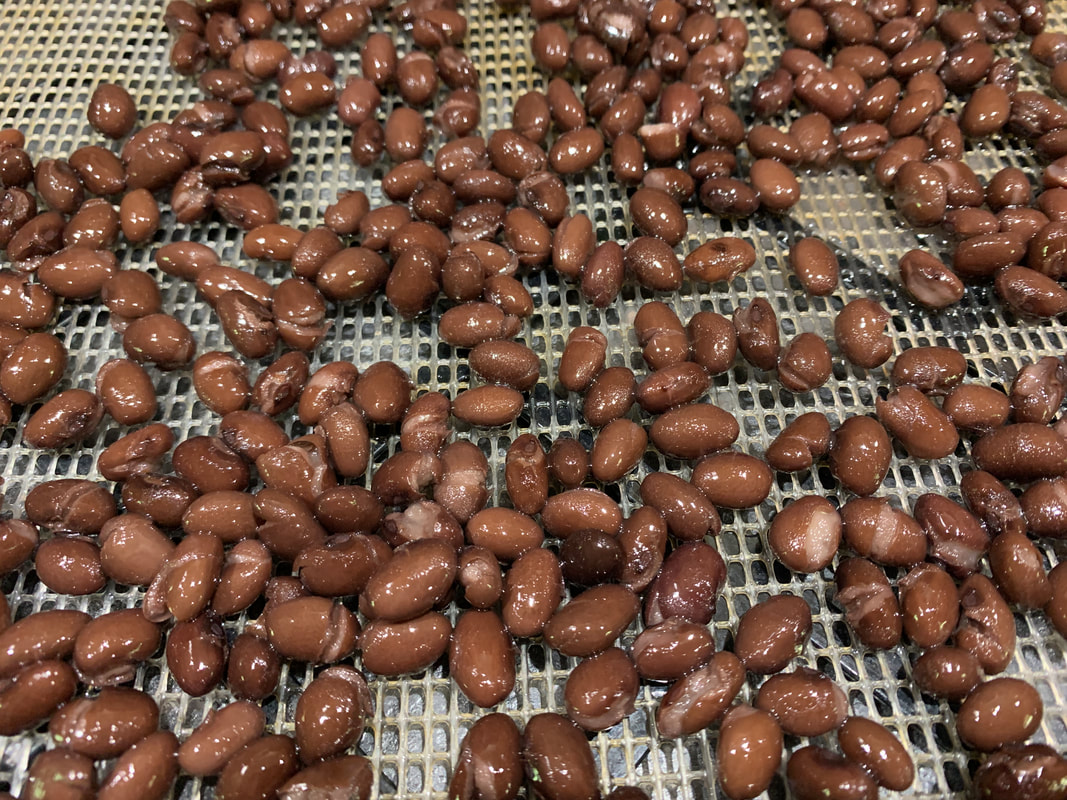
Dehydrated black beans
|
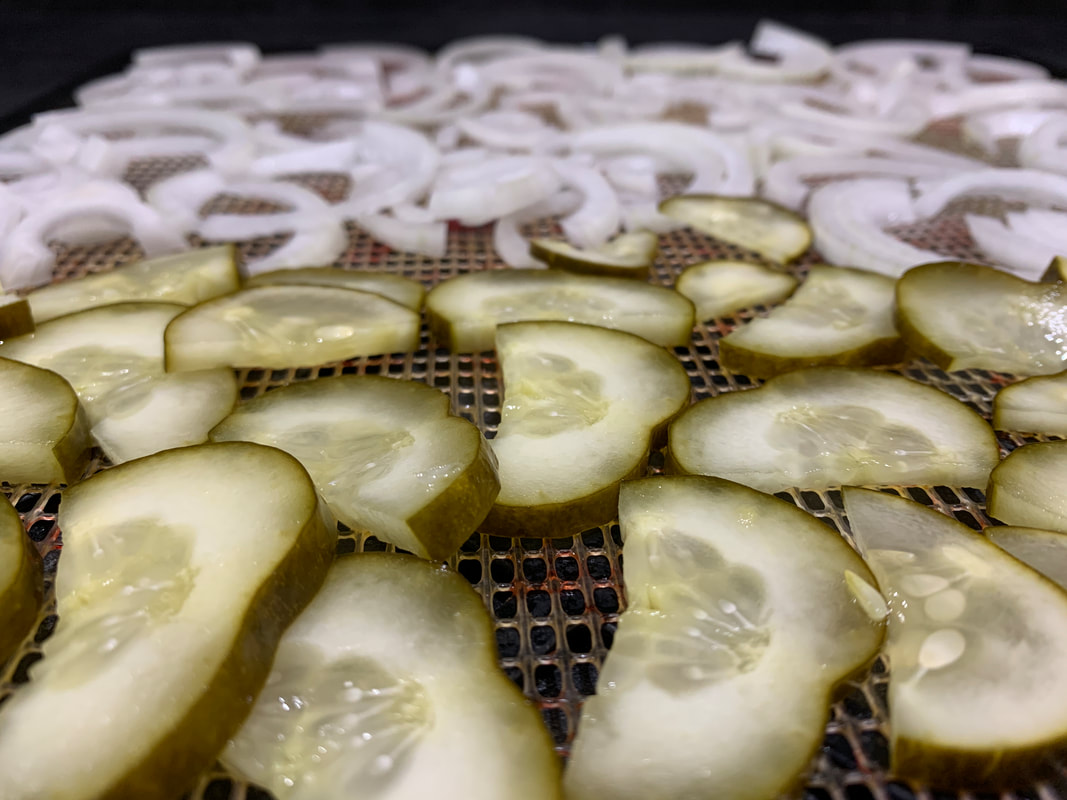
Dehydrated pickles & onions
|
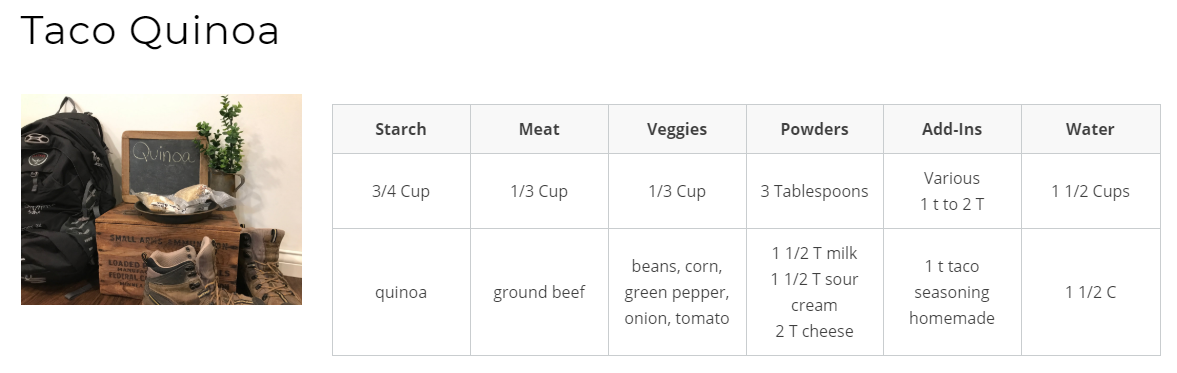
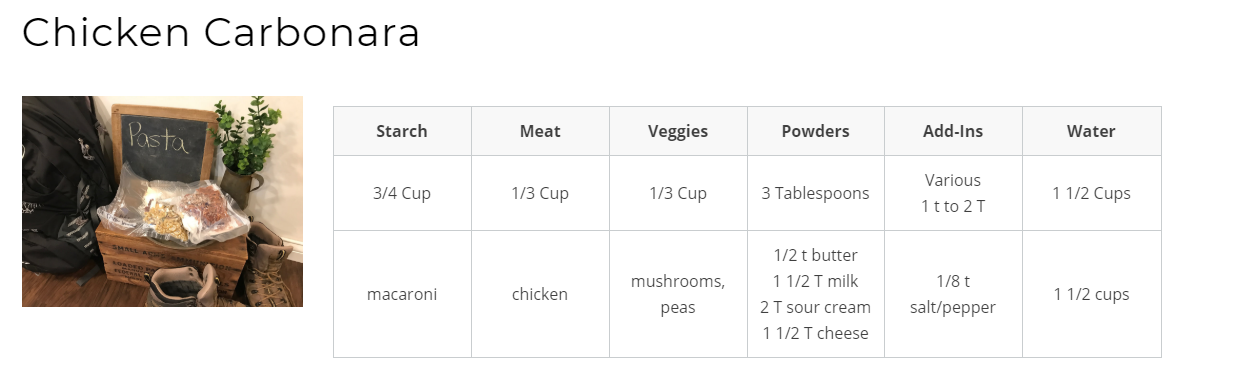
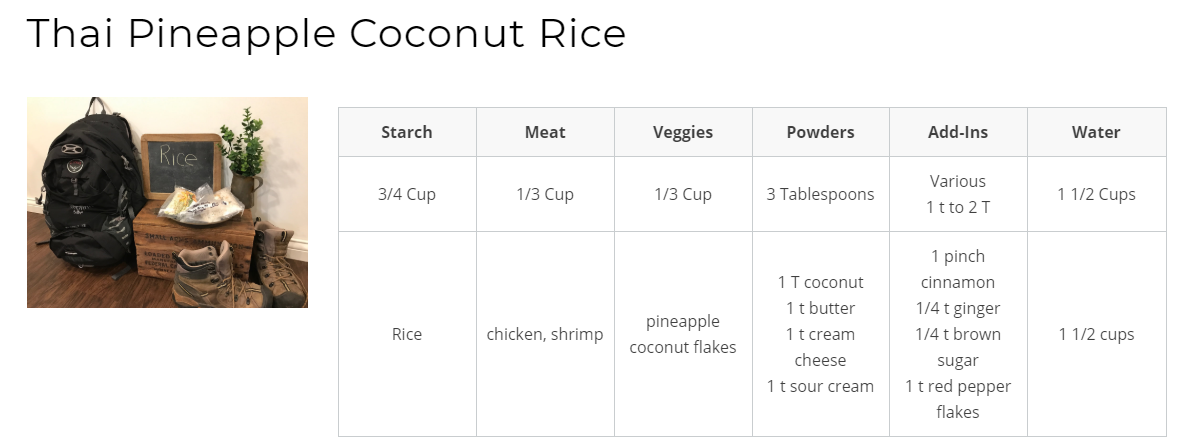
Our Favorite Recipes
Rice, Oats, & Potatoes: staples of backpacking meals

|
|
Big Mac pasta with ground beef, pickles, onion, tomatoes, and cheese. Bring a sample thousand island dressing pack to squirt on top.
|
Trail Meal Plans
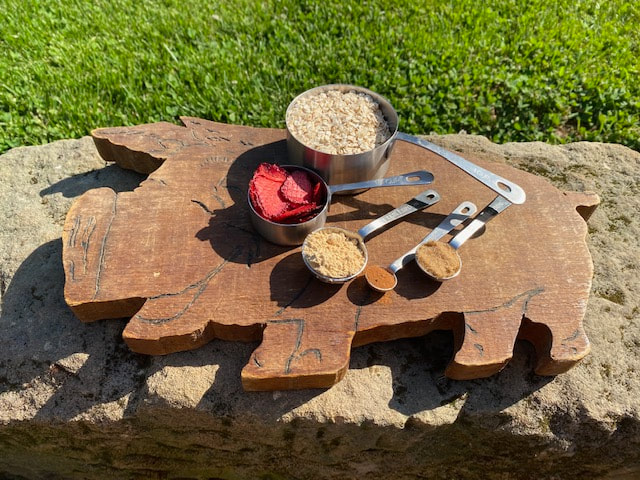
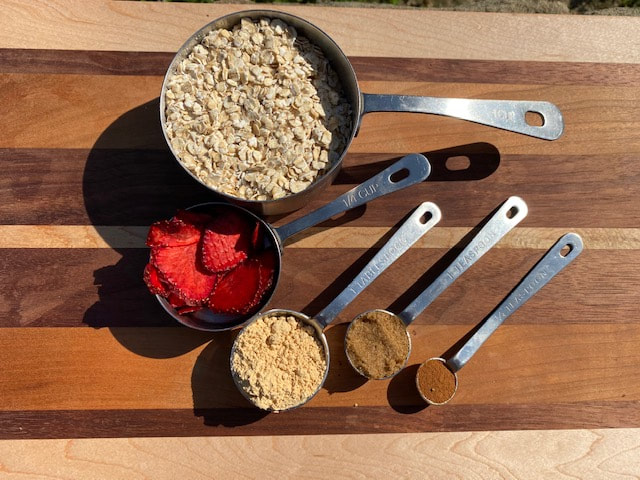
Peanut Butter & Jelly Oatmeal: 3/4 C oats, 1/4 C dehydrated strawberries, 1 T PB powder, 1 t brown sugar, 1/4 t cinnamon
Key Features:
-Overpack for emergencies & calorie burning
-Use gallon Ziploc bags to organize days
-Use plastic totes to organize foods in car for multi-day, multi-section trips
-Layout and bag each day to prevent overeating or eating favorites first
-Ideas for specific items:
Breakfast items:
Breakfast wraps with tortillas (sausage, egg, & cheese filling); granola with dehydrated milk & dehydrated fruit; oatmeal (cinnamon, brown sugar, dehydrated fruit, peanut butter powder, nuts); protein shakes & bars; stir in coffee cubes (like Jiva cubes) are the easiest way to get coffee
Lunch items:
Tuna packets (but not in bear country); dehydrated meals (see recipes above); peanut butter & carrots, cheese & crackers
Dinner Items:
Anything wrapped in a tortilla shell is a winner; dehydrating meals (see recipes above)
Snacks:
beef jerky, trail mix, dehydrated apples or fruit, payday candy bars, summer sausage/cheese/crackers; string cheese, protein bars, peanut m & ms, granola bars, smoked almonds, dried cherries or cranberries
Additional ideas-
Put a paper towel and handi-wipe in with each meal; lemonade mixes to spice up your water; bring chocolate squares, hot cocoa, spiced decaff tea for a small sweet dessert
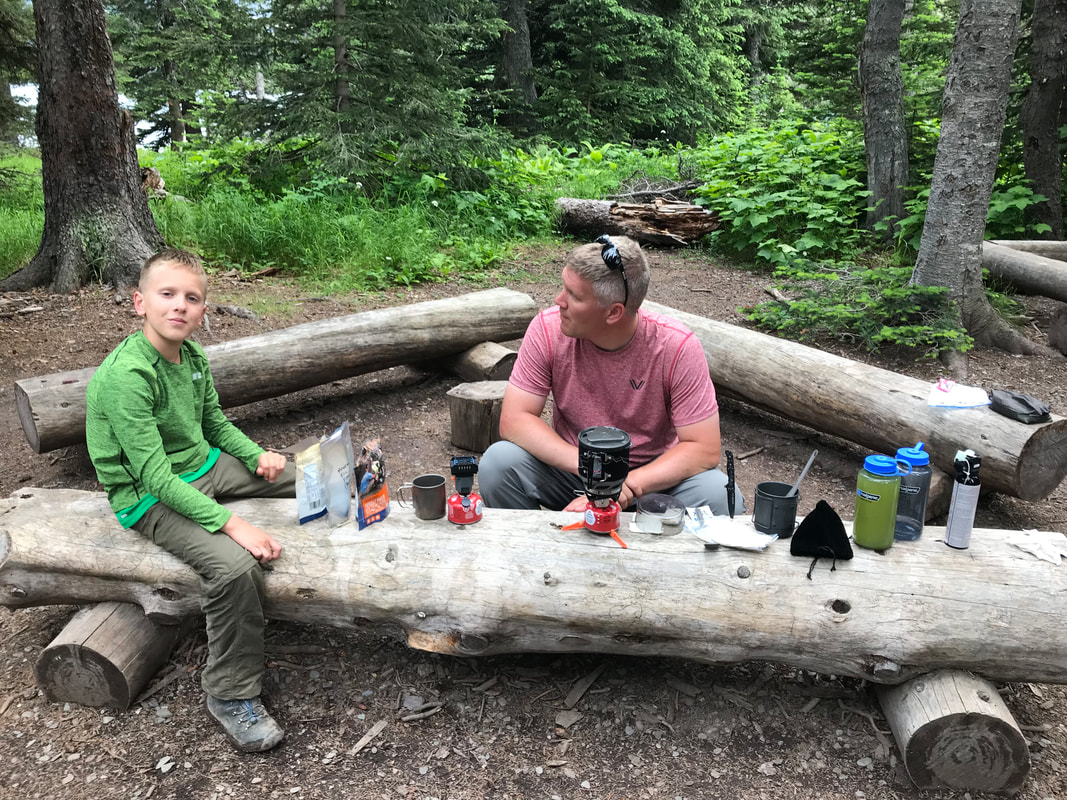
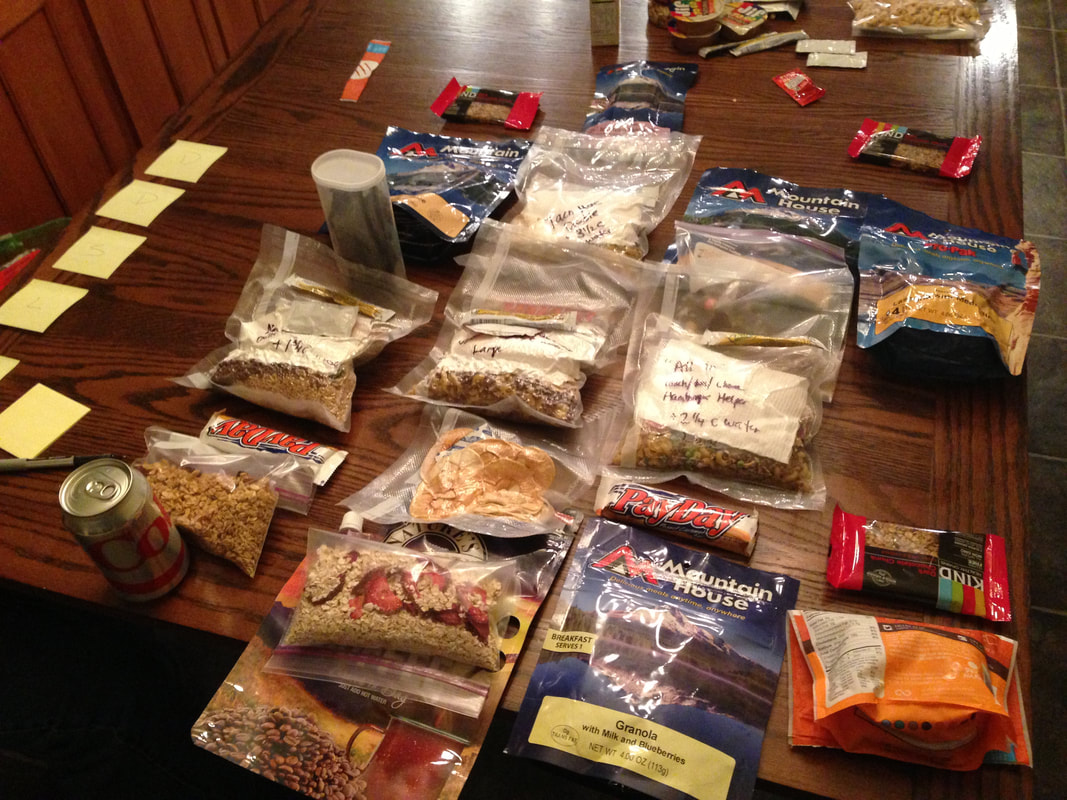
Planning out a big expedition in the back country can be a daunting task, especially the first time you prepare. Pouring over the weight and volume while making sure you have enough calories and won't tire of the same goulash is a lot to think through. We have refined our system over the years to something we are pleased with and always leaves us with full bellies for our adventuring.
1. We lay out a grid for each person: number of days one way, breakfast, lunch, and dinner the other.
2. We then fill each of our spots on the grid with something we are excited about eating.
3. Next we cross reference what type of item is in conjunction to the surrounding days items so we don't burn out or repeat types of food.
4. Then we consider what days we might have more activities or need a creature comfort or favorite food and move it around.
5. Finally, we add snacks for each day as quick grab and goes for in between meals.
6. After we have the grid filled in, we consider for any emergency situations or days we may run into trouble with cooking a meal or weather.
7. Once those steps are complete, we package each day into a gallon ziploc bag and label whose it is and what day it is for.
 Laying out our meals in a grid system for backpacking
Campfire Meals
When you have the time, resources, and packing space for a good old traditional campfire, why settle for dehydrated gruel when you can live high on the hog? Below is an assortment of some of our favorite, tried and true meals that work with fidelity over the campfire and smell great wafting over the tree tops. You are sure to draw in a raccoon or critter with these smells. We will continue to update the site as we add more pictures from our backcountry adventures.
Dutch Oven Desserts
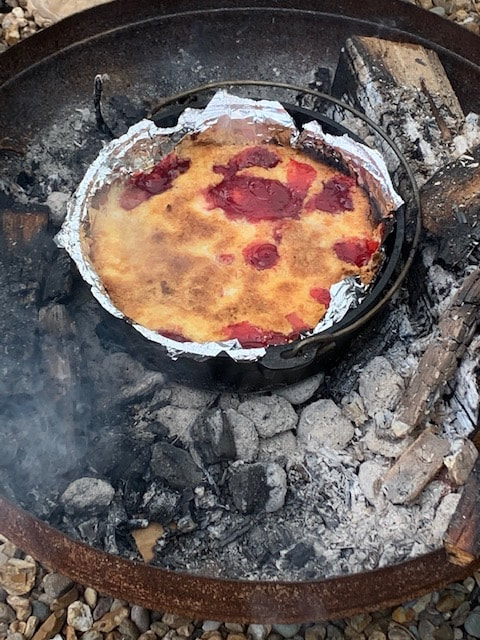
A dutch oven is essentially a large piece of cast iron cookware that is as heavy as lead. However, it can withstand the brutality of a campfire and acts as a mini oven when you are on the go. The key to cast iron is to not use soap when washing it and season it by wiping it down with cooking oil when you store it after each use. Lining it with foil makes for easy clean-up on the go. Our favorite recipe is for a cherry cake-like dessert.
Layer cherry filling, then dump in the cake mix on top and pat the butter pieces on top. As it bakes it will magically ooze together until you have a soft, dense cake and oozing cherry filling. Yum! Enjoy.
Layer cherry filling, then dump in the cake mix on top and pat the butter pieces on top. As it bakes it will magically ooze together until you have a soft, dense cake and oozing cherry filling. Yum! Enjoy.
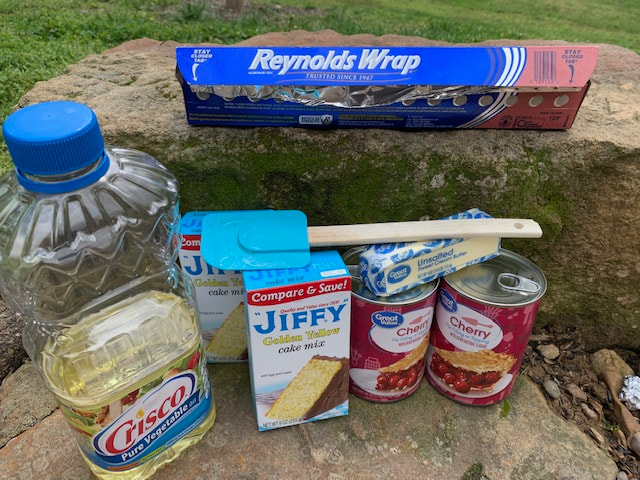
Cherry Cake: 1 stick butter, 2 cans cherry filling, 2 boxes Jiffy cake mix, oil to grease pan
|
Dutch Oven Cherry Dessert
|
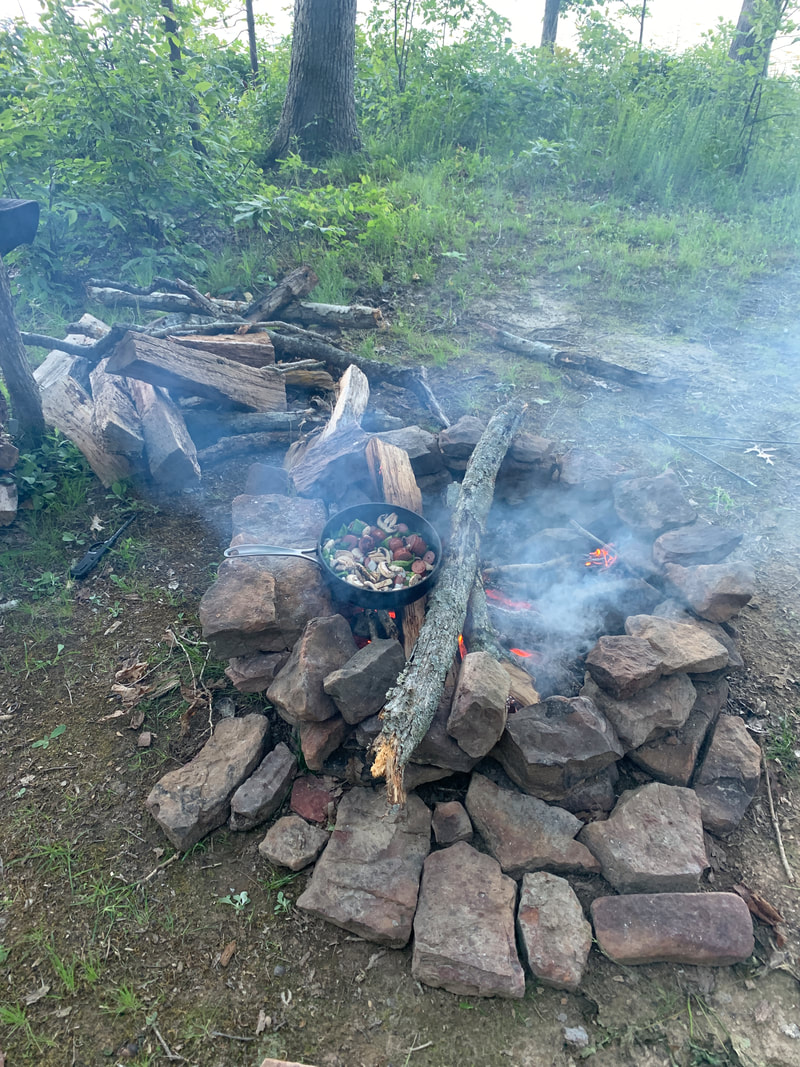
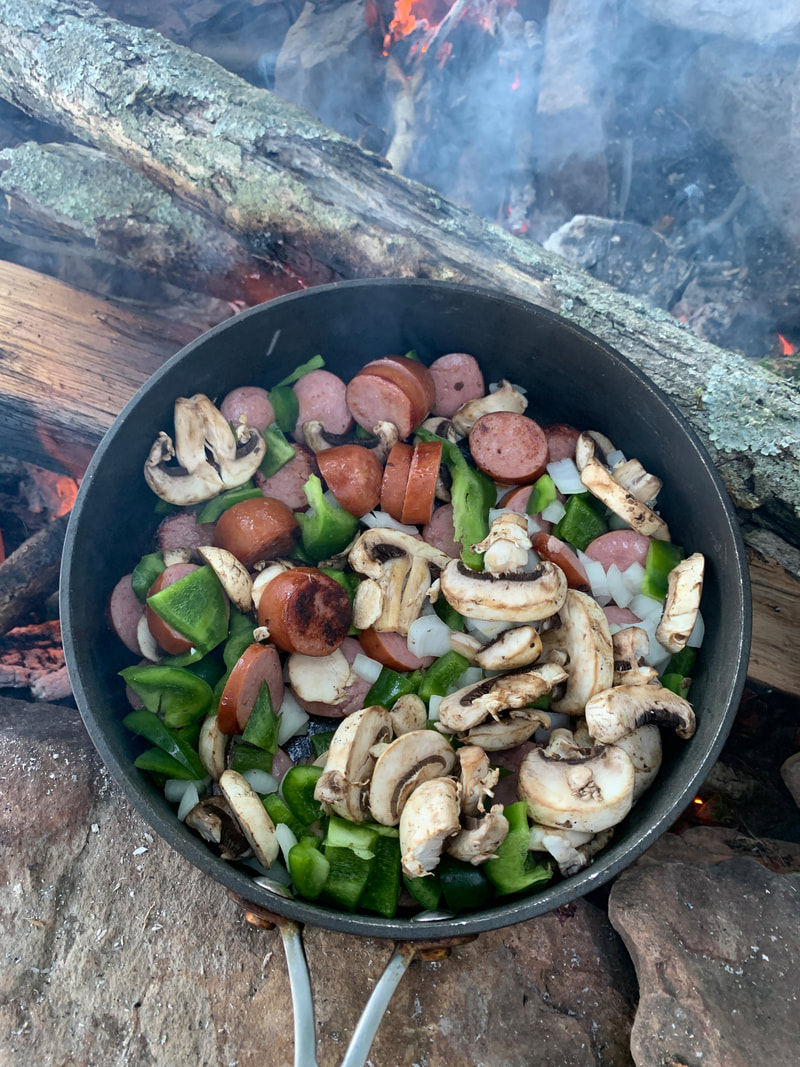
Smoked Sausage, Peppers, Onion, & Mushroom Skillet
Another crowd favorite is what we call the sausage & pepper skillet, but we put variations on it by adding mushrooms or potatoes. While it sizzles, it smells like a pizza, and can be eaten as is or stuffed into tortilla shells. The fat in the sausage helps coat the pan and the saltiness evens out by adding the veggies so you need little other ingredients. You can chop and bag your items ahead of time and need little to no refrigeration depending on if you are cooking it that night or the temperature outside is cool enough to be your refrigeration.
Campfire Sausage & Pepper Skillet cooking
|
Campfire Sausage, Pepper Skillet cooking
|
Campfire Pepper & Onion Skillet
|
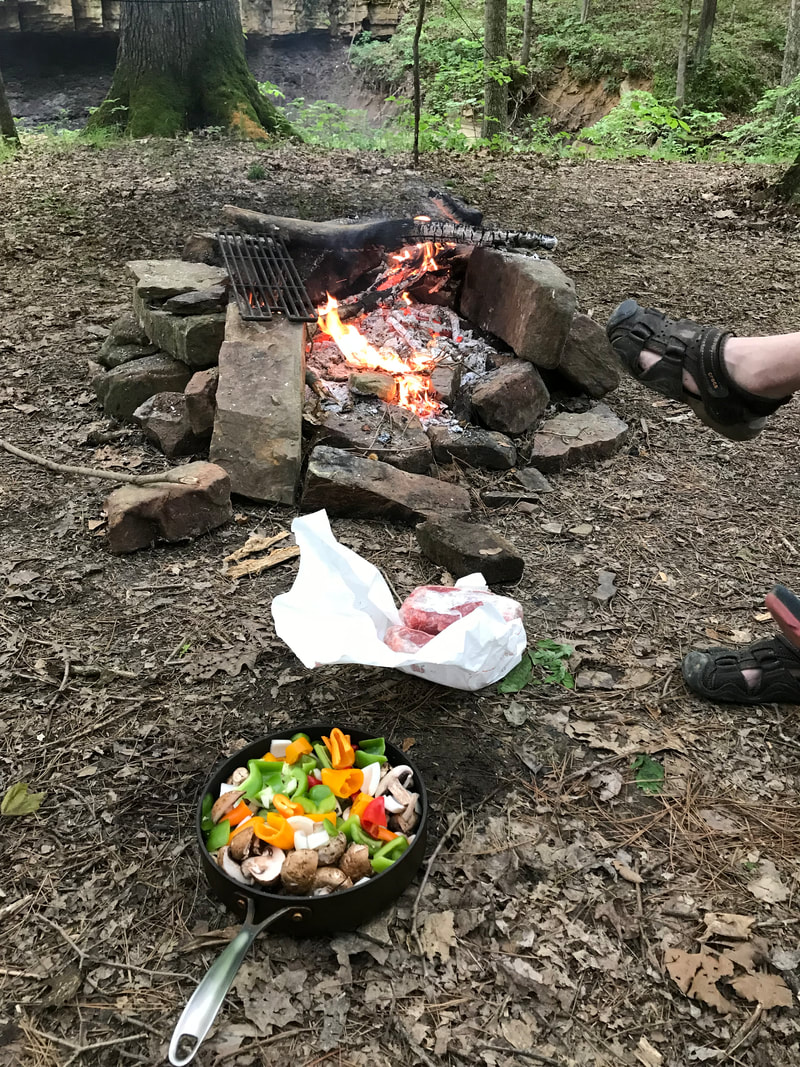
Shishkabobs & Twice Baked Potato
If you can score a grate or your site has been granted one by previous campers, shishkabobs are fun to assemble on the fire. Obviously, you can bring any veggie, meat, fruit combination you prefer. Ours usually include peppers, onions, squash, and zucchini. Pineapple is a nice sweet addition, if you like hot pineapple. The twice baked potatoes were done ahead of time and wrapped so that all I had to do was place them in the coals to reheat and allow the cheese to melt.
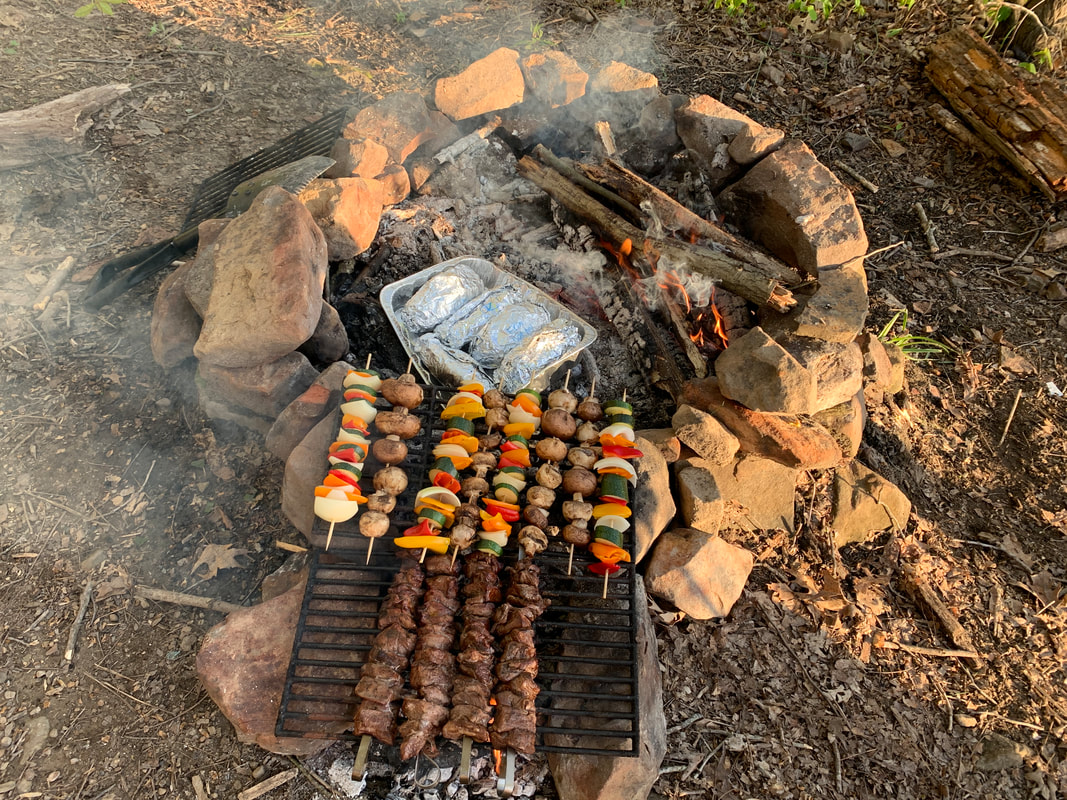
Shiskabobs on the campfire